
One of the reasons that iPhones have remained such a staple since they were first introduced is that they continue incorporating innovative technology that people seem to love. When iPhone introduced a built-in camera, it was a game-changer, and more advanced versions of that camera have only served to create a new generation of photographers.
When the camera on your iPhone takes pictures that seem to be consistently blurry, though, that can frustrate you. If you’re always asking yourself why is my iPhone camera blurry, you’ll be glad to hear that there are simple solutions that can usually solve the problem.
Blurry iPhone Pictures from an Unsteady Camera
The simplest reason that your iPhone camera’s pictures are blurry is that you’re not taking the shots with a steady hand.
That happens fairly often. Keeping your hand perfectly steady as you’re trying to get a shot is actually more challenging than you might think.
There are a couple of potential solutions if that’s what’s happening with your device. You could first try using both hands to take the shot rather than just one.
That’s going to be tough with selfies, but if you’re trying to take a picture of something that’s in front of you and some distance away, then you can hold the phone with one steady hand and press the shutter button with a finger from your other hand. Try it and see if that makes a difference.
The other thing that you can do is to get one of the tripods or camera holders that are on the market which were specifically designed for iPhones. There are several different ones, some of which are cheaper, others more expensive.
If you’re not sure of which one to get, then first consider how much money you want to spend. The other thing that you might do is to look around online and assess some of the reviews of the different camera holders.
You will want to go with one that gets consistently positive feedback from consumers.

There Might Be Something on Your iPhone’s Camera Lens
The next solution is another simple one. Try wiping off your iPhone’s camera lens. There might be some kind of grime or accumulation there that’s affecting the quality of the shots you’re taking.
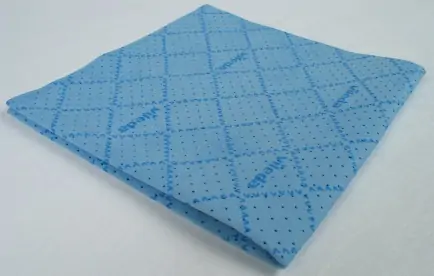
A microfiber cloth is the best for this sort of thing. You can get one at many stores, or you can buy them online.
You can also use a tissue if you have one handy. Don’t try to wipe off the lens with your fingers. It’s probably just going to make things worse.
Remove the iPhone from Its Case
You can also try removing the iPhone from the case in which you’ve been keeping it before taking pictures. Your case could be making the shots come out blurry or dark.
You can also check to make sure that your phone isn’t in the case upside down. If it is, part of the case might be blocking the camera lens.

Close and then Reopen the Camera App
If it’s not one of the things that we’ve mentioned so far, then a software issue could be another possibility.
Closing and then reopening the camera app should be your next move. You can open the iPhone’s app switcher by double-clicking the Home button if you have an iPhone 8 or an earlier model than that.
If you have an iPhone X or a more recent model, then you can swipe up from the bottom of the screen.
Next, swipe the camera app off the top of the screen, closing it out. You’ll know that the app is closed when you no longer see it in the app switcher.
Finish by opening the app back up and taking pictures with it again. See if that has cleared up the blurriness.
Try Restarting Your iPhone
Restarting your iPhone would be something to try next if the problem persists.
This is a solution that can potentially solve many issues. It might be that the camera is blurry because one of your apps has crashed, or a minor software glitch might be happening.
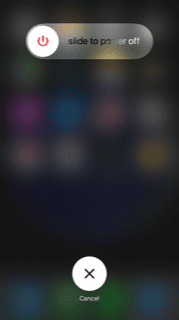
If you have an iPhone 8 or an older model than that, press and hold the Power button down until a “slide to power off” slider shows up on the screen. Slide it to the right, and the phone will restart in a few seconds.
If you have an iPhone X or a more recent version, you’ll need to press and hold down the side button. At the same time, you must hold down either the Volume Up or Volume Down button.
The slider will appear like with the older iPhones. Slide it, then wait for the phone to restart and try taking pictures with it again.
Try Putting Your Phone in DFU Mode
You might also try putting your iPhone in DFU mode. DFU means Device Firmware Update. It’s a mode for your iPhone where the device can interface with iTunes without loading your operating system or boot loader.
This can be the answer if an obscure software problem is causing blurriness and restarting the phone hasn’t fixed it. Before you use this mode, though, make sure to back up your phone with iTunes or iCloud.
To back up your phone with iTunes, connect the device to a computer running the latest version of iTunes with a USB cable. Hit the Device button you see on the top left side of the screen. Then, hit Summary, followed by Back Up Now. Wait a few seconds while the process concludes.
To back up the device with iCloud, connect to a stable Wi-Fi network. Head to Settings, followed by Your Name, and then hit iCloud. Hit iCloud Backup, and then Backup Now. Wait a few seconds while the process concludes.
Now, you’re ready to try DFU mode.
- To put the phone into DFU mode, first, plug it into your Mac or PC and open iTunes.
- Press the Sleep/Wake button along with the Home button if you have an iPhone 6 or older. If you have an iPhone 7 or a more recent version, hold down the Volume Down button.
- After about 10 seconds, release the Sleep/Wake button. However, you should continue to hold either the Home or Volume Down button depending on which generation of the phone you have.
- A message will come up on iTunes which says “iTunes has detected an iPhone in recovery mode.”
- Now, you can let go of the Volume Down or Home button. Your phone’s display will be completely black if you have successfully implemented DFU mode. If it didn’t work, try it again.
- Now you can restore your phone using iTunes and try taking pictures again. This step is a bit more extreme, but sometimes it corrects blurriness issues.
Try Checking for an iOS Update
It’s not very likely, but it could be that an iOS update will help you. That’s going to be the case if the problem is a software issue having to do with the camera and not a hardware one.
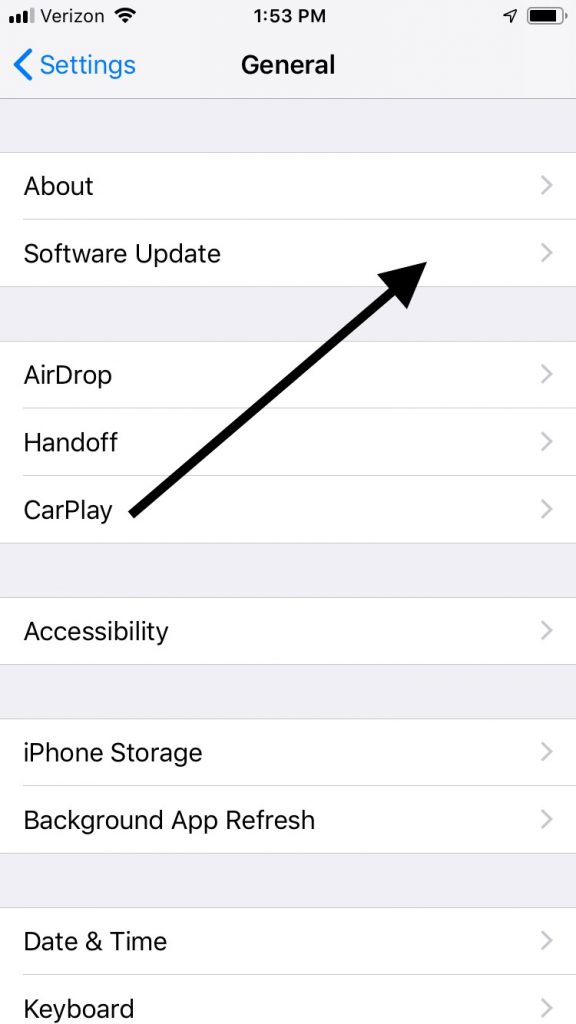
- Plug your device into an outlet, then connect to Wi-Fi.
- Hit Settings, General, and then Software Update.
- Hit Download and Install to update right then. Put in your passcode when the phone prompts you to do so. If you want to wait until that night, you can press Install Tonight. Plug your phone into power before you go to sleep, and the new version of iOS should be there and ready to go when you wake up.
- Now, you can try taking pictures again to see if that made a difference.
Try Getting Your iPhone’s Camera Repaired
The one other thing that you can do if nothing has worked is to get someone to look at the iPhone, and the camera specifically.
A Genius Bar at an Apple Store will have some individuals who should be able to open up the phone and take a look at the internal mechanism of the camera. If something is happening with the hardware, then they can likely detect and fix it.
If a hardware issue with the camera is to blame, then it should cost you nothing to get it fixed if your device is still under warranty. If you bought it brand-new, then you get a one-year warranty with it.
You might have also purchased an extended warranty, or you might have an AppleCare+ plan. Both of those should also cover a hardware issue with the camera.
If your device is no longer under warranty or covered by an AppleCare+ plan, then you will likely have to pay to fix any hardware issue with the camera. Hopefully, the damaged component will not cost very much to repair.
If you very much enjoy taking pictures with the camera, then you might be okay with spending the money on the fix. If the repair’s cost seems too prohibitive, though, you might consider trading in the phone and getting a more recent model with a camera that’s in perfect condition.
If you like opening things up and tinkering with them, then you may be tempted to try a repair yourself. However, it’s best if you resist this urge.
If you open up your phone and try to repair the camera yourself, then you will likely void the warranty, assuming you still have an active one. It’s best to let the experts handle this instead.


