
If you’re an iPhone owner, and you use your device often, you’ve probably accumulated an impressive photo collection. The iPhone’s camera system is second-to-none, particularly with the recent generations. Some of the shots you take might capture moments with your friends and family that you’ll cherish for the rest of your life.
When you feel it’s time to trade in your older iPhone for a new model, you don’t want to lose any of those photos. In this guide, we’ll explain how to transfer photos from your old iPhone to your new iPhone.
Transferring iPhone Photos
You should find transferring your iPhone photos between devices to be fairly easy. That is because all iPhones, and other Apple products as well, run iOS.
This is the universal operating system that Apple has been using for the past several years. Each new version that comes out introduces new features and gets rid of bugs from previous ones. iOS 16 is the most recent version.
When you’re transferring your photos, the easiest way to do it is by backing up your older version of the iPhone and then copying that saved version to your new one. The saved version that you transfer to the new iPhone will include your apps and settings, and it will also contain all of your photos.
The First iPhone Photo Transfer Method: Through iTunes
The first way that you can transfer your iPhone photos is through iTunes. What you’ll need to do is attach your old iPhone to your laptop or PC with an Apple-approved USB cable.

Launch the latest version of iTunes. On the upper left-hand side of your computer’s screen, you should see Devices. When you click on it, you’ll see your iPhone. It should appear as whatever you named it.
On the right-hand side of your computer’s screen, there will be an option to Back Up the iPhone. Go ahead and do that. In a couple of minutes, you should have a backup of the phone, and you can safely disconnect it from the computer.
Next, you’ll take your new iPhone and connect it to the laptop or PC with the USB cable. You can go through the same process until you’re looking at the options for what to do with the phone.
You’ll see Restore from Backup on the right-hand side of the screen. There might be a couple of different backup options. You’ll know which is the right one by looking at the timestamp and date for the most recent one you did.
Once you have restored from that backup, you can disconnect the new iPhone. You should have all of your apps and settings from the older version, as well as all of your pictures.
You can discard or change the settings and apps as you’d like. You can also rest easy knowing that every one of your photos has made the trip to the new device.
The Second Way to Transfer iPhone Photos: Use iCloud
iCloud is the preferred photo transfer method for many iPhone owners. It’s nice to use because it’s already on your iPhone. You don’t ever have to worry about messing around with iTunes or your computer.
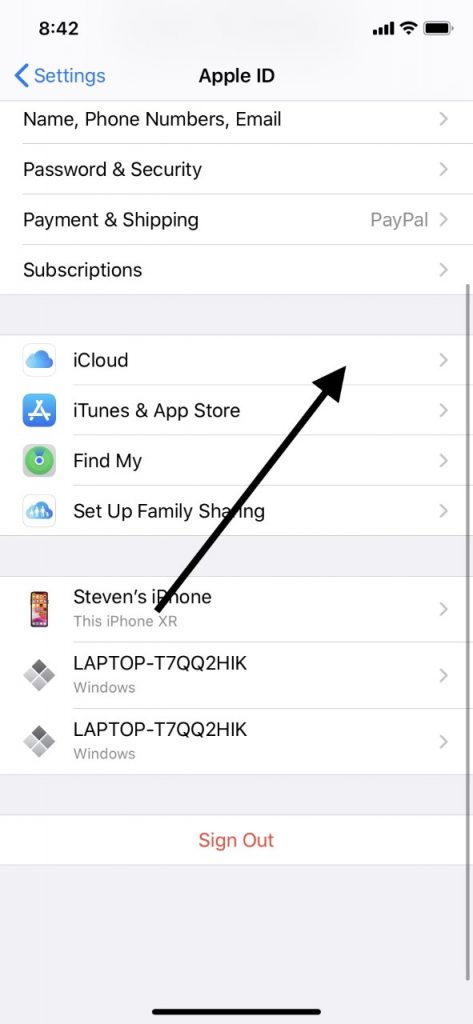
First, you’ll open the Settings app on your older iPhone. Tap Your Name and Picture at the top of the screen, and then tap iCloud. Scroll down to iCloud Backup and hit it.
Make sure that the iCloud Backup is in the “on” position. You’re looking for the slider to be green and to the right. If it isn’t, then tap it.
Hit Back Up Now, forcing a backup. Now, you will have an up-to-date version of your older iPhone in iCloud storage. That version will include your apps, settings, and all of your photos. If the iCloud backup fails, here are some troubleshooting steps you can follow. If your iCloud storage is full and you can’t complete a backup, you can clear some of your existing iCloud storage or buy more iCloud storage..
The next step will be to transfer the backed-up version to your new iPhone. First, turn on your new iPhone and follow the various setup instructions on the screen.
You’ll need to be logged into your new iPhone using the same Apple ID and password that you used for the older on. Make sure that you have those handy if you don’t have them memorized.
There will be a step where you will be asked whether you would like to set up your phone as new or whether you want to restore an existing backup using either iCloud or iTunes.
At this point, you can select Back Up from iCloud. You should see the most recent version of the older iPhone backup that you created. Again, you can tell that it’s the right one because of the date and timestamp.
Wait a few moments for this transfer to take place. How long it takes will depend on the number of configurations, apps, photos, and videos that were on the older iPhone.
When it’s done, you should be able to see and access all of your photos. You can choose to keep or discard whatever apps or configurations you’d like.
Is There a Way to Transfer Photos Between Phones Without iTunes or iCloud?
Some iPhone users also want to know whether you can transfer photos from an older version of the iPhone to a newer one without using iTunes or iCloud. There is a way, though it usually involves paying for some additional software.
There are a few different companies that make software that lets you transfer or multiply your iPhone files between devices, including your photos, without syncing. For instance, there’s one called EaseUS MobiMover.
This software acts as an iOS data transfer tool. You can use it, provided you’re running iOS version 8 or later on your devices. To learn how to use this kind of software, purchase it, and then read the instructions that come with it.
You can use this software to move your photos from an old version of the iPhone to a newer one without iTunes or iCloud. The only drawback is that you’ll need to pay for the software. Because of that, you’ll probably prefer to use one of the first two methods we’ve suggested.
Now, you know several ways to transfer photos from your old iPhone to your new one. When you use any of these options, you can preserve each one of your treasured pictures as you move on from your older iPhone to a newer model.
How to Take Photos with an iPhone
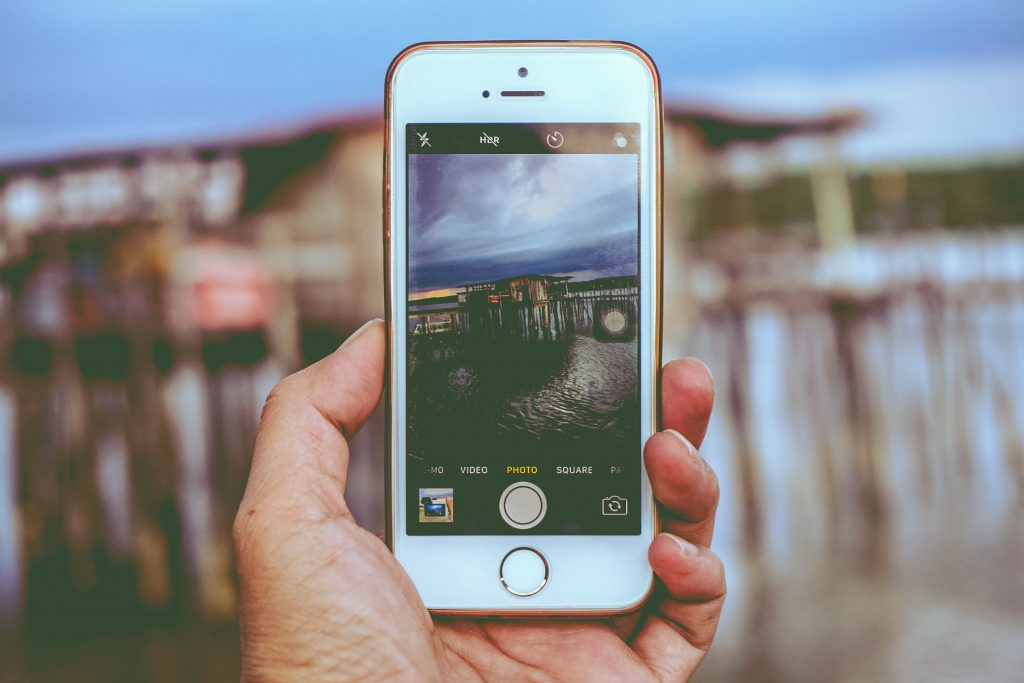
If you haven’t learned how to take pictures with your iPhone yet, here’s a quick crash course. When you open the Camera app on your iPhone, it’s in Photo mode. You can use this mode to take still pictures.
If you swipe to the right or left, you will see different options, such as Portrait, Slo-Mo, Pano, Time-Lapse, and Video. Which choices you’ll have depend on which generation of iPhone you own.
To take a shot, press the Shutter button. You can also press either one of the Volume buttons when you’re in Camera mode to take a shot.
You can press the little lightning bolt icon to turn the flash on or off depending on how good the light source is when you’re shooting. You can also set a timer for a shot you plan on taking. This is useful if you’re setting up a group picture.
Frame the shot, stabilize the iPhone, and then tap the circular icon at the bottom of the screen that looks like an old-fashioned egg timer.

With this information, you can quickly start taking professional-quality pictures. You’ll be able to commemorate vacations, special days, or even just the great breakfast you’re about to have that’s Instagram-worthy.


