
iPhone Wi-Fi Not Working? Here’s How to Fix It
Reboot Your Router and Modem
Sometimes the most straightforward explanations are the correct ones, and it could be that what’s gone wrong is something with either the router or the modem to which your iPhone is connected.
Reboot your router and modem by switching them off, waiting a few seconds, then turning them back on again. Try connecting to the Wi-Fi again on your iPhone and see if your connectivity has been restored.
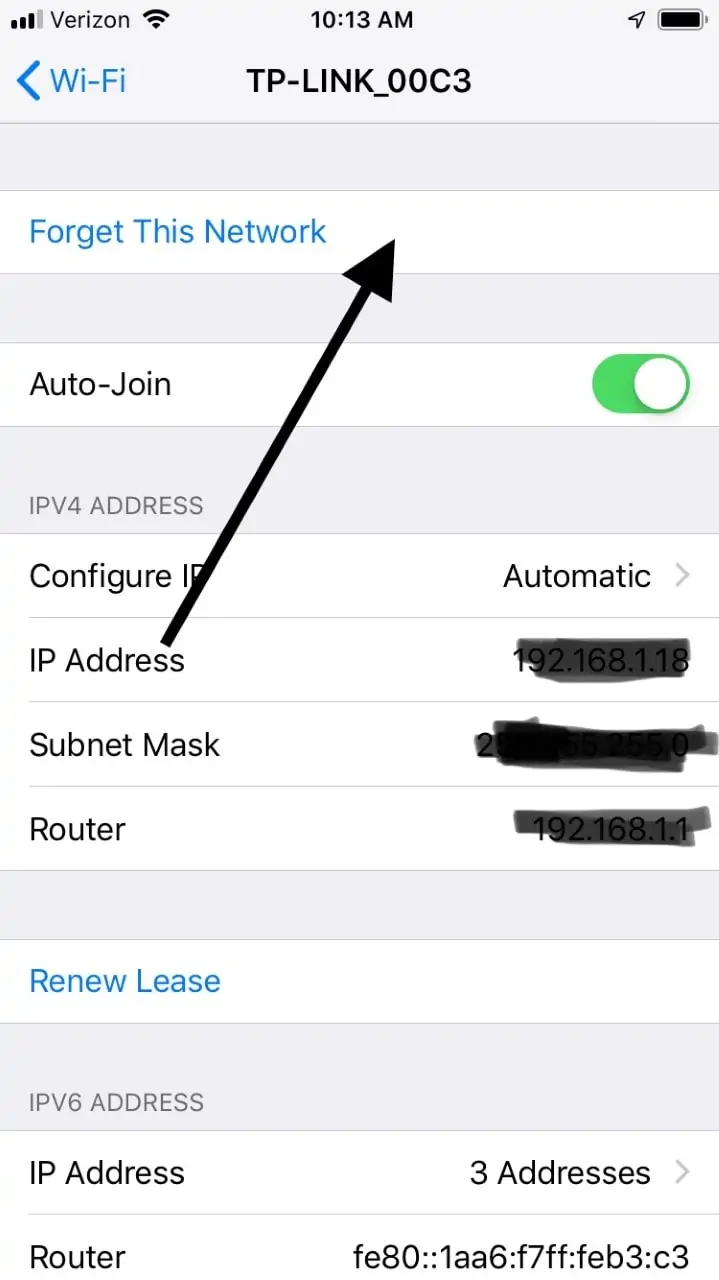
Use the Forget This Network” Feature
This is a feature on your phone that will allow you to search for the Wi-Fi signals in your area again if for some reason it has become disconnected. Sometimes an iOS update makes that happen.
- Open Settings on your phone.
- Tap Wi-Fi.
- Tap on the name of whichever network you usually use.
- Hit Forget This Network. You’ll see a prompt that says, “Forget Wi-Fi Network?”
- Hit Forget.
- You’ll then need to rejoin that network by entering your password. After you’ve done so, check to see if the issue has been solved.
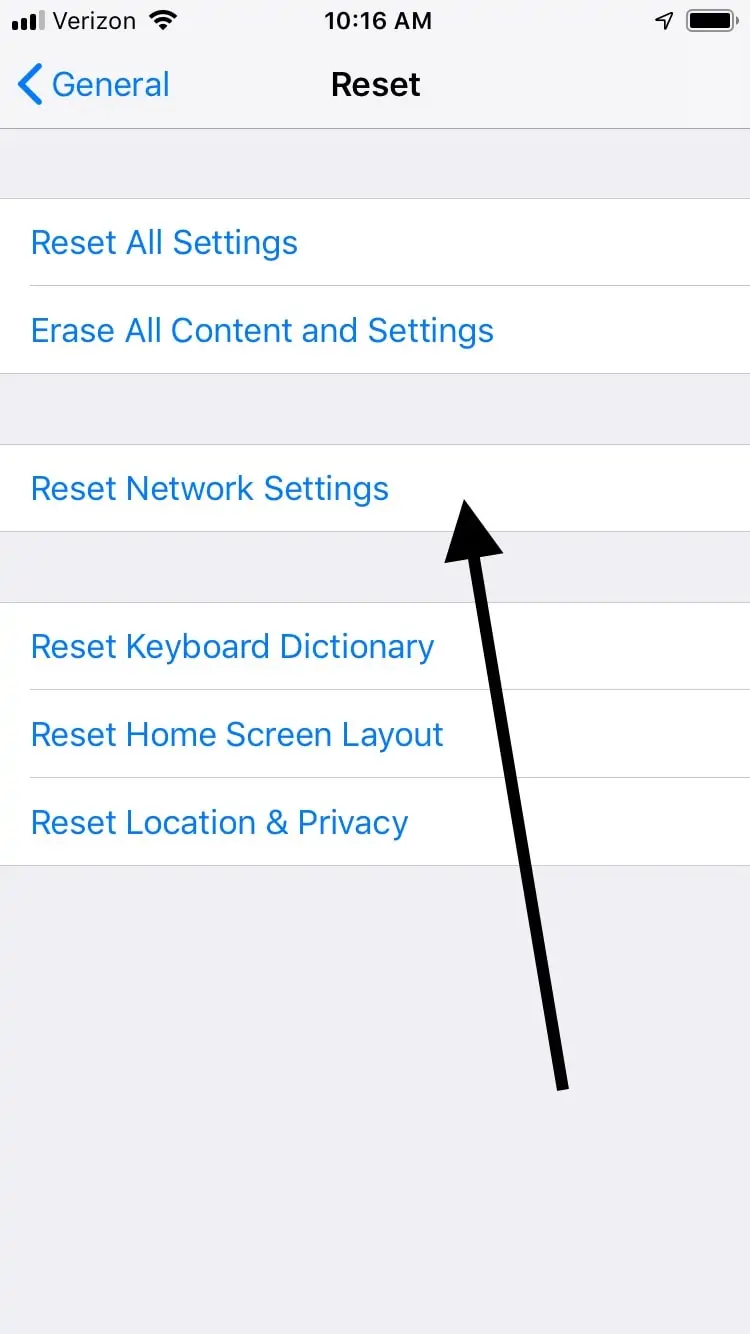
Reset Your iPhone Network Settings
If that didn’t get the job done, you could next try resetting the entire network settings for your iPhone. However, keep in mind that by performing this action, you’re going to lose your VPN settings, your Wi-Fi password, and your current cellular and Wi-Fi settings. Still, it’s worth it if it solves the issue.
- Launch the Settings app on your phone.
- Tap General.
- Scroll down to where it says Reset, then tap on Reset Network Settings. That will probably get the Wi-Fi working again.
Toggle the Wi-Fi Assist On and Off
You can also try toggling on and off the Wi-Fi Assist feature, which is available in more recent iterations of iOS. Wi-Fi Assist is meant to help you if your iPhone encounters weak or shaky Wi-Fi networks.
- Hit Settings.
- Hit Cellular, or Mobile Data with some iPhone models.
- Once you scroll down to the very bottom, you’ll find Wi-Fi Assist.
- Toggle this on and off 2-3 times.
- Check to see if you can get the Wi-Fi again.

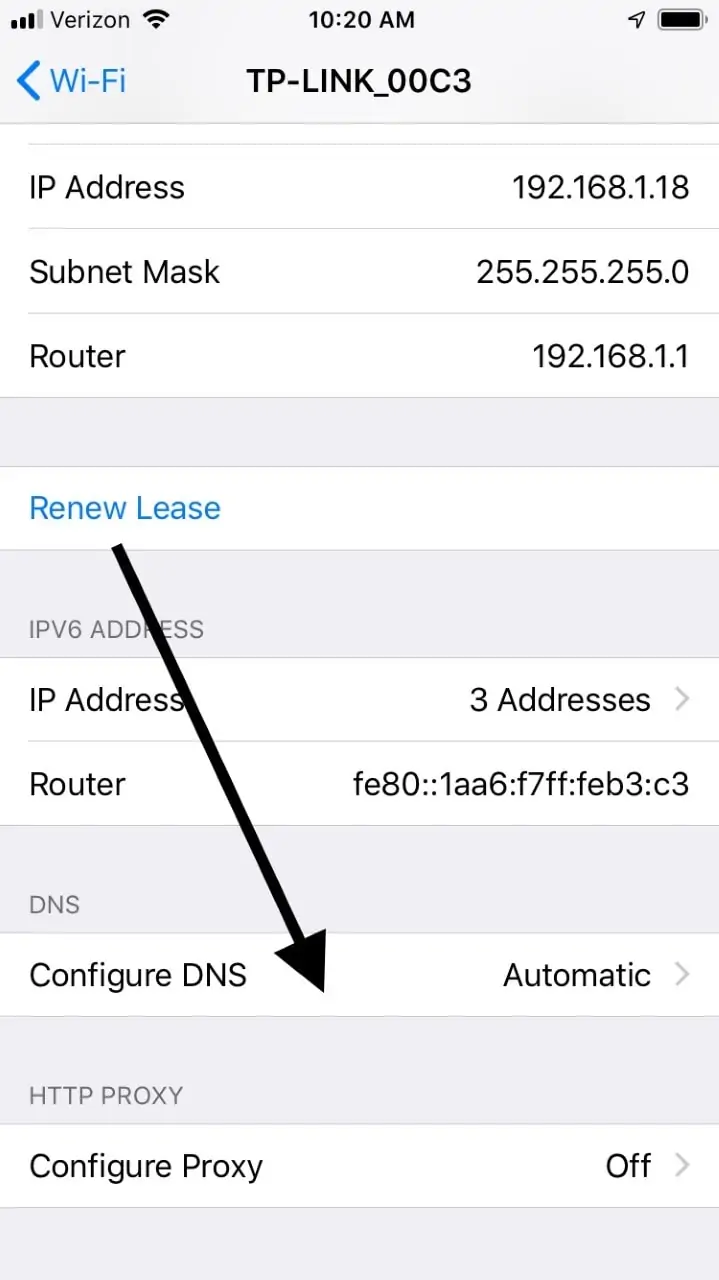
OpenDNS or Google DNS
The internet is not always going to be working for you at the same speed. Sometimes slowdowns are inevitable. You can change the existing DNS server to either OpenDNS or Google DNS, and you might get better Wi-Fi connectivity that way.
- Open Settings in your iPhone.
- Tap the Wi-Fi
- Tap on the name of the network that you are currently using. You’ll see some details about it that are going to be in number form. For instance, take note of the IP Address, Router, DNS, and the Subnet Mask.
- Tap on the numbers seen next to DNS. There, you can type Google DNS in the Primary DNS position, and the secondary DNS as separated by a comma. You can also try OpenDNS if Google doesn’t seem to be working for you.
- The configuration for Google is 8.8.8.8, 8.8.4.4. The one for OpenDNS is 208.67.222.2222, 208.67.220,220.
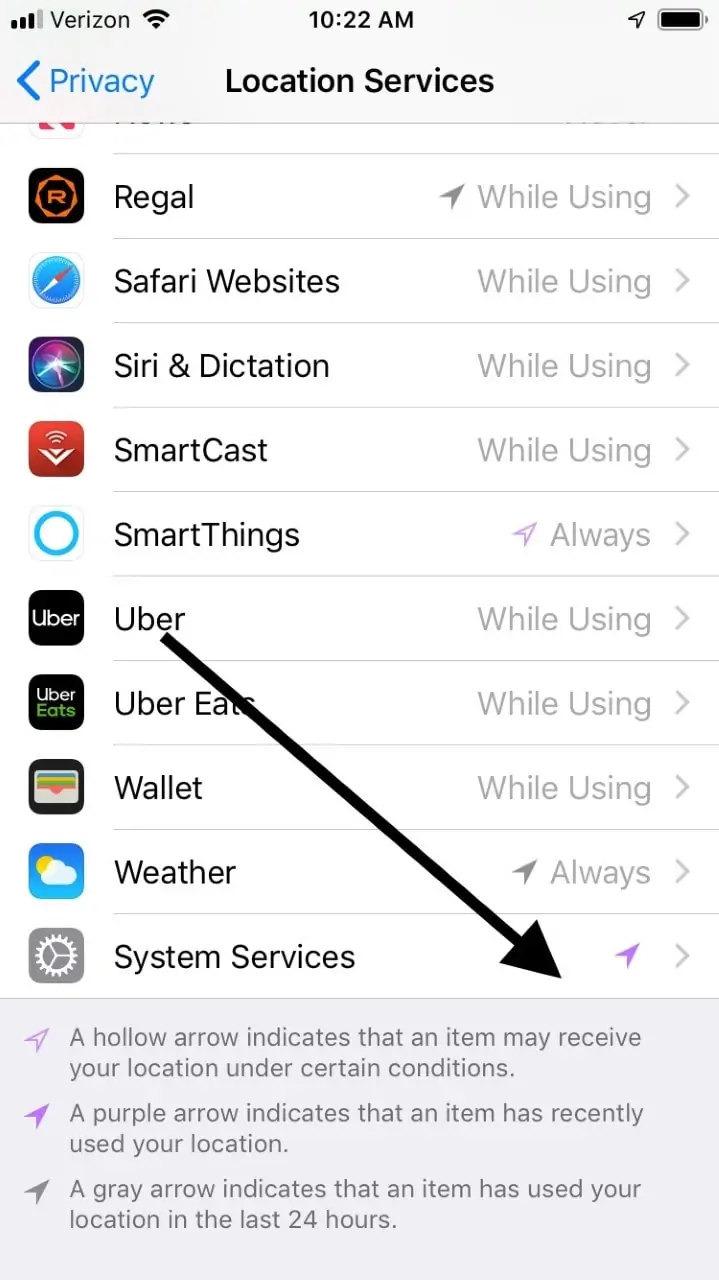
Turn Off the Location Services for Your Wi-Fi Networking
Disabling your phone’s location services has yielded positive results for some people if your Wi-Fi is still struggling.
- Open the Settings app on your iPhone.
- Tap Privacy.
- Hit Location Services, then scroll down and tap on System Services.
- Toggle the Wi-Fi Networking option to the Off position.
- Reboot your iPhone to see if that corrected the issue.
Get the Latest iOS Update through iTunes
You could be thinking at this point that an iOS update might solve your Wi-Fi woes. It is true that many software problems with your phone can potentially be corrected by performing the latest update. However, it might be advisable if Wi-Fi remains a problem to go through iTunes rather than installing the update through your phone itself.
- Make sure that you have the most recent version of iTunes on your computer.
- Connect your iPhone to it.
- Click on the iPhone icon that you see at the top left-hand corner of the screen with iTunes.
- Click on Summary and see if there are any iOS updates available.
- If you see one, hit Download and Update.
Downgrade Your iOS to Fix Your Wi-Fi
Now we’re getting into last resort territory. If you’ve tried everything that we’ve suggested and your Wi-Fi is still acting up, then you might be able to restore it by downgrading the iOS that you’re running.
- Go to Settings on your phone.
- Tap on iCloud.
- Scroll down, and then tap on Find My iPhone.
- Toggle this to the off position.
- Turn off your phone by holding down the power button.
- Open up iTunes on your desktop, laptop, or tablet.
- Connect your iPhone to whichever one you have.
- Press the Power and Home buttons on your phone for 10 seconds at the same time.
- Release the Power button while holding the Home button. You’ll see a message that says, “A device in recovery mode has been detected.”
- Click on your iPhone where you see it as discoverable in iTunes.
- Click on Summary, then Restore.
- You should see the option of a prior version of iOS that’s there for you to use. If you select it, then it should install, and you’ll now be running an earlier version of iOS.
That might correct the Wi-Fi issue for now, but you should only view it as a temporary fix. You’ll need to go back to newer versions of iOS at some point so that your phone is secure. Try to get your iPhone to a Genius Bar whenever you can, so that the Apple employees can get a look at it.
Hopefully, one of these options will get your Wi-Fi going again. If the problem persists, then seeking the help of Apple Support is the next logical step.